|
Toy Trucker &
Contractor
|
|
|
Build A Fence Ridin’ Chevy Before you can tackle the body, a decision is required. Namely, what color are you gonna paint it? In 1941, three colors were in general use: black, dark blue and dark green, with dark green apparently being the dominant choice. Opting for dark green, I still needed to know the interior colors. According to an excerpt of a book on restoring Chevy pickups that I found on the internet, in 1941 the standard interior color was something called Thunder Gray for everything but the upholstery. In that time period, utility was more important than fashion and upholstery was generally a sort of moose brown, chosen so that grime and dirt wouldn't show.
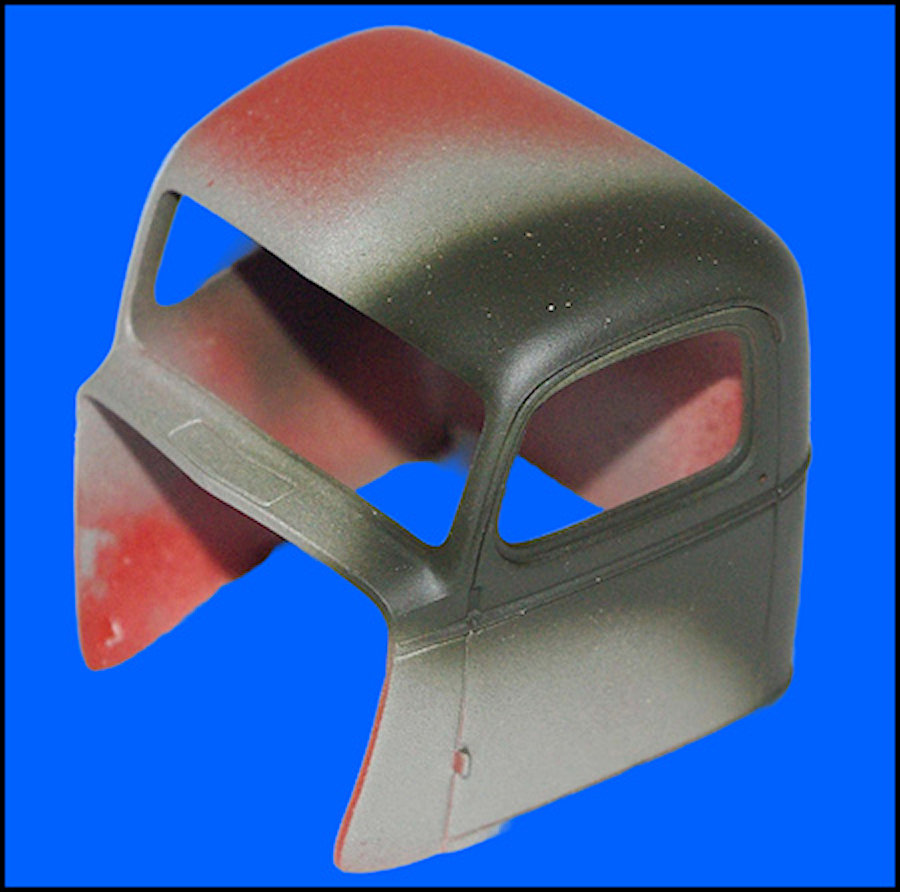
Given the fact that the purpose of this project is to replicate a well used truck, it would require a three coat paint system. As you can see from the demonstration photo above, I started by spraying all the body parts Dupli-Color Red Oxide Primer from a rattlecan, creating a layer of rust. That was then followed by an overall coat of Model Master Steel and finally the Dark Green color coat, which was mixed by adding a little Model Master FS37038 Flat Black to Model Master FS34079 Dark Green. In case you're wondering, the Model Master Dark Green wasn't quite dark enough, based on a color chip I found on the internet. When I get around to weathering, this sequence will allow for a more realistic appearance. You'll see exactly what I'm talking about when we get to that point. With all of the body paint dry, the cab interior, door panel inserts and firewall interior was airbrushed Model Master FS36118 Gunship Gray. The floor area of the fender assembly was brush painted Gunship Gray. Of course the underside of the fender unit was shot with more FS37038 Flat Black.
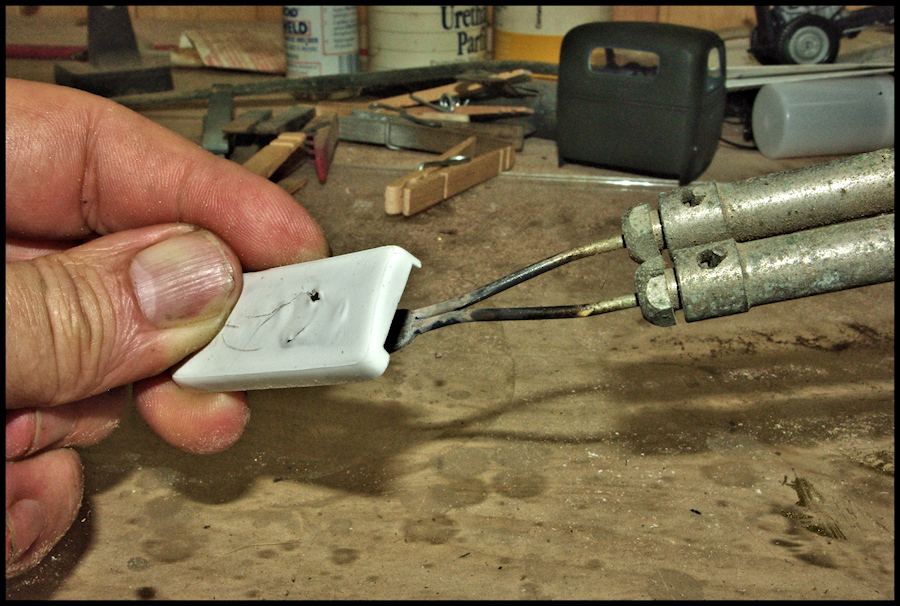
When you're building a model of a truck that's been rode hard and put away wet more often than not, you have to think about how every area will look. Upholstery in particular. Since you're going to have worn and cracked upholstery, you don't want to have the bench itself looking smooth and even. Do you? Of course not. In order to avoid that, I used my Weller soldering gun with an attached cutting blade that you see in the above photo to soften the bench and back plastic from below. This technique is more subjective art than skill, so practice on something else if you haven't done it before. Anyway, the object is to soften the bench just enough so that you deform the surface with your thumb, pencil eraser or whatever else with get the results you want. Basically, you're trying to create a slightly irregular, lumpy appearance without being too obvious. Don't forget to treat the seat back in a similar manner.
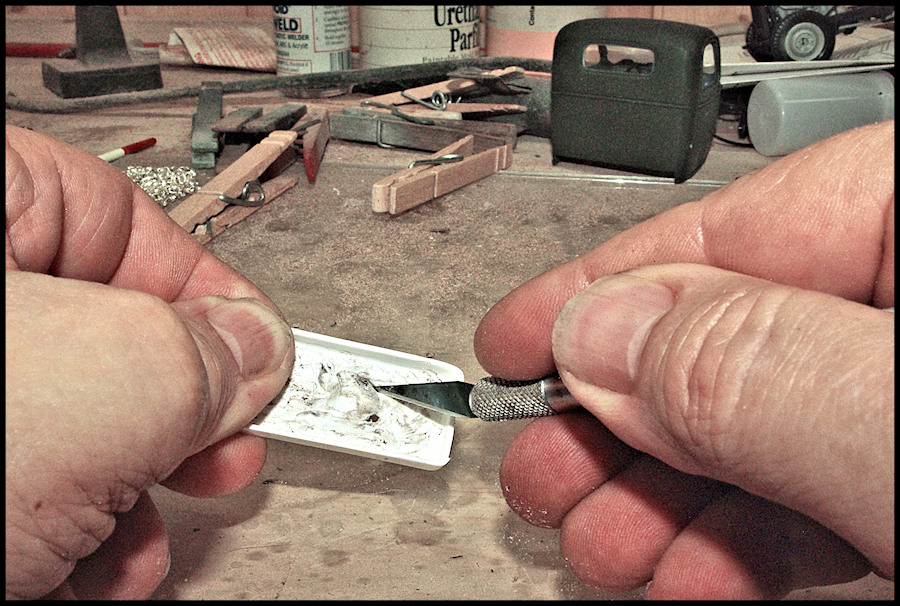
If you want to have a little bit of cotton padding showing thru a crack or worn spot in the upholstery, here's how to go about it. The object is to get the underside of the seat bench thin enough that you can then take a knife blade...or your thumbnail...and push it thru the surface, creating an irregular crack or slight open space. Remember, less is more in this case. As you can see in this photo, I am NOT adding the cotton at this time. I'm simply creating a small crack or thin spot in the seat bench.
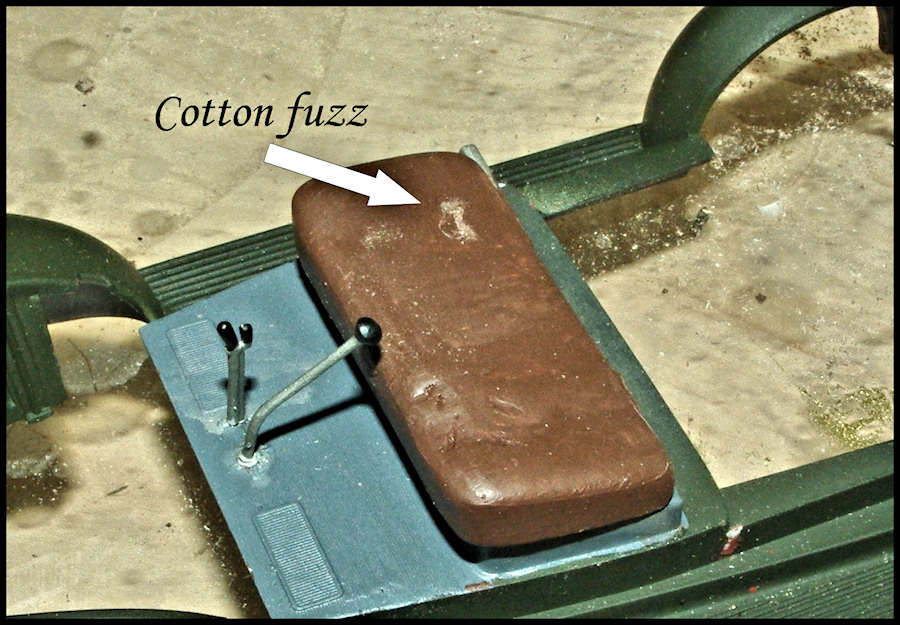
Now, after the bench has been massaged, aged and painted a dull, drab brown, cement a little bit of cotton from a Q-tip, cotton pad or medicine bottle insert to the underside of the bench seat. Doesn't matter where as long as it covers the thin spot or small crack you created earlier. Push a little bit of it into the crack and pick it out on the topside with a needle, dental pick or knife point. Glue the seat bottom in place and turn your attention to the cab. |
|
| Return to home page | |
|
|
|


